


Let me just admit that I am proud to be a mom with a camera. And I'm also the proud owner of a $12 backdrop stand that I designed and made all by myself. I even cut the PVC pipe myself! For the first time I actually felt like I belonged in Lowe's. Mom with a camera and a hacksaw. Scary stuff, eh?
I do have to give thanks to the guy with the white hair that I met at the camera shop. I was looking for large clips to hang a backdrop from some shelving that runs down the middle of our garage ceiling. He told me to just go buy some PVC and build one. So, I did.
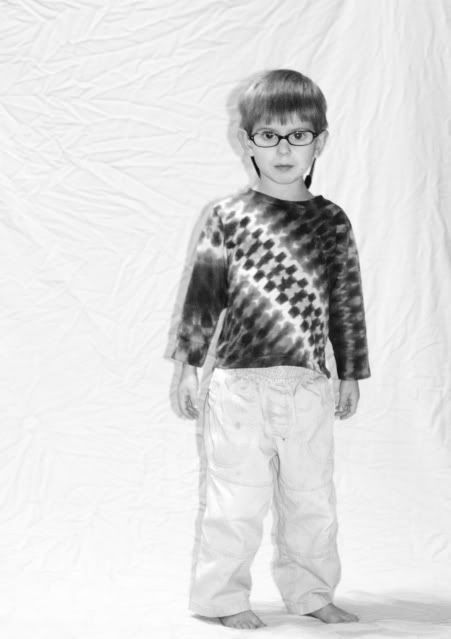
I was planning to wait until the sun comes back out to post this. I was hoping to have some superfabulousamazing photo with knock you over catchlights from the garage light and all that jazz. But at 8:30 tonight I just couldn't stand it anymore. I set it up, turned on every single light in the house, popped up my on-camera flash and let the kids play. They thought I had built them half a fort.
(Hold on. That gives me an idea! How cool would it be to buy some more pvc and build a rockin' fort for the living room?!! I'm so going back to Lowe's this weekend.)
Anyway, here's my cheesy pics and insanely brilliant instructions. Can you feel the potential here? I think I'm going to have some fun photo sessions coming up soon. I have a plan for my mom and dad, and of course the kids. I just have to come up with something convincing to say to my dad that might make him want to actually stand in front of my camera. And yes, I'll be sure to iron the backdrops first.

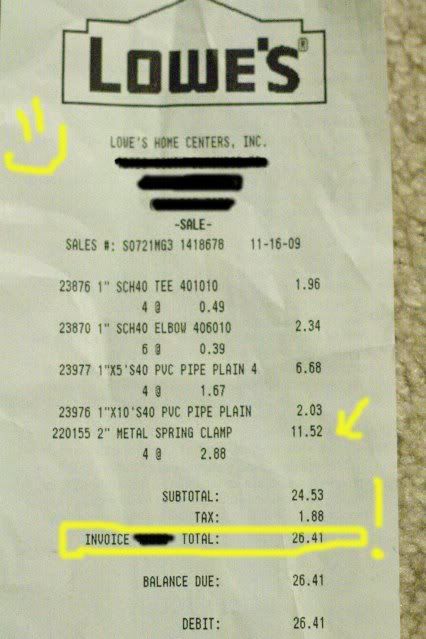

I bought 1 inch PVC
3 - 5 foot lengths
6 - 2 foot length
6 elbow joints
4 T joints
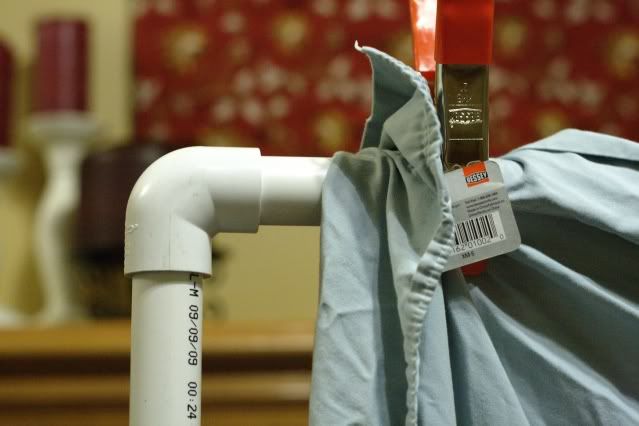
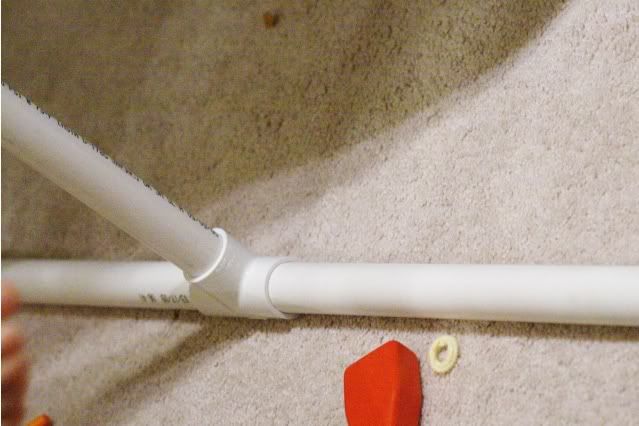
Use two elbow peices to connect one 5-foot pipe to each leg pipe(5 ft). The other 4 elbow peices need to go on the end of the 4 2-foot stabilizer legs as feet so that the whole thing is more stable.
That's it. I built mine and set it up right in Lowes plumbing aisle just to make sure I didn't forget any peices. And FYI - they will cut the 2-foot lengths for you. I cut mine because they were busy when I was there and I didn't want to wait. If you have a hack saw at home, you can cut it yourself no problem. Don't glue any of the joints. I can take the whole thing apart for compact storage or easy travel and if I want to put different backgrounds on it. It takes about a minute to assemble the whole thing. The Big hand grips I bought in the tool aisle and they were $3 each. So the stand only cost me $12! Top that BH Photo.
Oh - and mine is 5 feet tall, which should be just fine for most everything I do. But I did buy the 2 extra T's and two extra 2-ft lengths so that I can extend the backdrop up to 7 feet tall. I haven't bought any muslin backgrounds, but I have plenty of fabric and plan to buy some rolls of vinyl. I also found a great deal on a fake floor, but I'm ahead of myself. I need to practice with the basics first.
I do have to give thanks to the guy with the white hair that I met at the camera shop. I was looking for large clips to hang a backdrop from some shelving that runs down the middle of our garage ceiling. He told me to just go buy some PVC and build one. So, I did.
I was planning to wait until the sun comes back out to post this. I was hoping to have some superfabulousamazing photo with knock you over catchlights from the garage light and all that jazz. But at 8:30 tonight I just couldn't stand it anymore. I set it up, turned on every single light in the house, popped up my on-camera flash and let the kids play. They thought I had built them half a fort.
(Hold on. That gives me an idea! How cool would it be to buy some more pvc and build a rockin' fort for the living room?!! I'm so going back to Lowe's this weekend.)
Anyway, here's my cheesy pics and insanely brilliant instructions. Can you feel the potential here? I think I'm going to have some fun photo sessions coming up soon. I have a plan for my mom and dad, and of course the kids. I just have to come up with something convincing to say to my dad that might make him want to actually stand in front of my camera. And yes, I'll be sure to iron the backdrops first.
I bought 1 inch PVC
3 - 5 foot lengths
6 - 2 foot length
6 elbow joints
4 T joints
Use two elbow peices to connect one 5-foot pipe to each leg pipe(5 ft). The other 4 elbow peices need to go on the end of the 4 2-foot stabilizer legs as feet so that the whole thing is more stable.
That's it. I built mine and set it up right in Lowes plumbing aisle just to make sure I didn't forget any peices. And FYI - they will cut the 2-foot lengths for you. I cut mine because they were busy when I was there and I didn't want to wait. If you have a hack saw at home, you can cut it yourself no problem. Don't glue any of the joints. I can take the whole thing apart for compact storage or easy travel and if I want to put different backgrounds on it. It takes about a minute to assemble the whole thing. The Big hand grips I bought in the tool aisle and they were $3 each. So the stand only cost me $12! Top that BH Photo.
Oh - and mine is 5 feet tall, which should be just fine for most everything I do. But I did buy the 2 extra T's and two extra 2-ft lengths so that I can extend the backdrop up to 7 feet tall. I haven't bought any muslin backgrounds, but I have plenty of fabric and plan to buy some rolls of vinyl. I also found a great deal on a fake floor, but I'm ahead of myself. I need to practice with the basics first.
that is so cool chelle, i will be showing this to my husband!! you are awesome!
ReplyDeleteVery cool, Chelle. Once we move, I plan on making one of these, too.
ReplyDeleteif you put gromets into the top of your background sheet you could put up a bunch of backgrounds without taking down one to put up another would just slide them to the side kind of like a shower curtain. thats what I do I have a brown backdrop, white, and black
ReplyDelete